

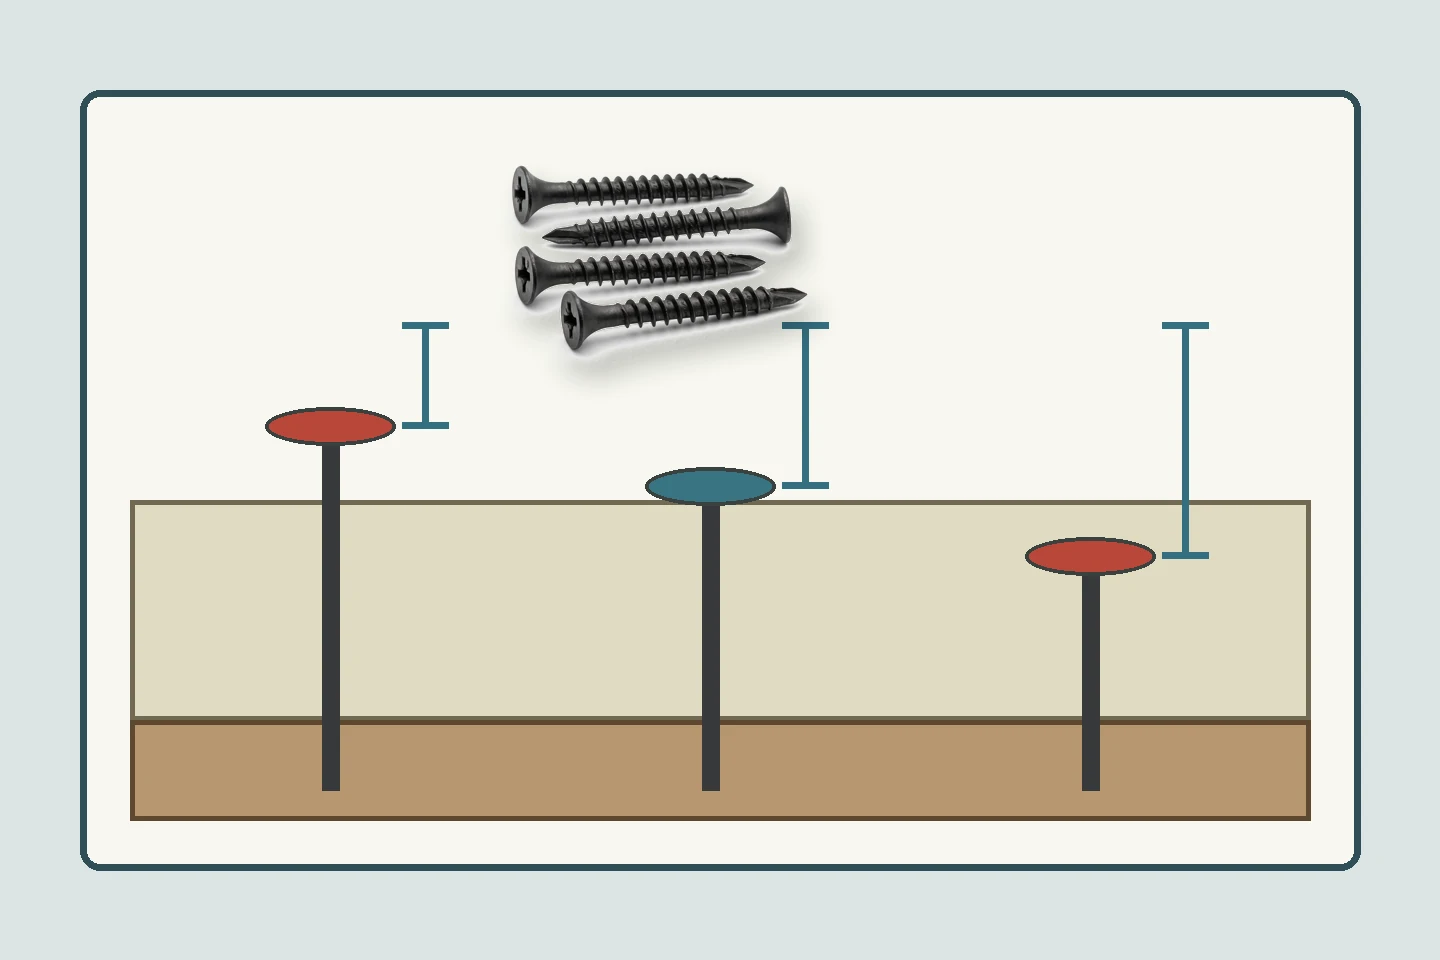
Drywall screw drive depth inspection should distinguish a proud head, an accepted seated head, and an overdriven head without treating surface appearance alone as proof. The inspector must also observe whether the face paper remains intact, the screw engaged the intended framing, and the board is properly supported.
ProAirNails recommends agreeing the inspection method before finishing work hides the screw line. A named gauge, lighting condition, sampling route, defect definition, and repair authority create a more consistent decision than fingertips or memory.
Define three seating zones before inspection
A proud head stands above the intended surface and can interfere with finishing. An accepted position meets the project rule while preserving the face paper and board condition. An overdriven screw penetrates beyond the accepted boundary, often with visible paper damage or a deep depression. Add separate defect names for torn paper, missed framing, angled drive, head damage, and board breakage.
Use a reference method, not a single viewpoint
Specify the gauge or straightedge, contact points, lighting, viewing direction, surface cleanliness, and measurement resolution. A gauge should bridge an appropriate local surface without rocking on compound, debris, or an adjacent damaged area. Verify the gauge condition at the start of each inspection period.
| Condition | Evidence to record | Do not assume |
|---|---|---|
| Proud head | Gauge contact, location, head and recess | That more torque is always the repair |
| Accepted seat | Surface relation and intact paper | That framing engagement is proven visually |
| Overdrive | Depth indication and paper damage | That compound restores the fastening function |
| Angled drive | Head plane, entry angle, edge condition | That flush appearance means correct engagement |
| Missed support | Location, movement, framing evidence | That depth adjustment solves the miss |
Plan the inspection route across the installation
Sample perimeter and field areas, board joints, corners, openings, ceilings, repaired zones, tool-change points, shift changes, and contrasting framing locations. Use a grid or station sequence so inspectors do not choose only easy visible screws. Record room, wall or ceiling, board, framing, crew, time, and tool where traceability is required.
Inspect before and after nearby movement
Board support and screw appearance can change when an adjacent screw is installed, a board edge is pressed, or a temporary support is removed. Check the suspect point without manipulating it first. If movement is part of the diagnostic method, record the original state and the controlled action separately.
Separate product, tool, board, and framing causes
A proud screw may reflect limited torque, a worn bit, dense framing, blocked depth control, damaged recess, an angled approach, or incorrect screw selection. Overdrive may involve excessive setting, worn nose contact, weak or damaged board face, unsupported edges, repeated attempts, or operator technique. Keep observations grouped until evidence supports a cause.
- Confirm screw identity and length.
- Inspect bit and recess engagement.
- Check tool depth control and power source.
- Record board and framing type.
- Preserve representative defects before repair.
Read the applicable screw scope correctly
The active ASTM C1002 page covers steel self-piercing tapping screws for application of gypsum panel products or metal plaster bases to wood members or steel studs. Project documents, board systems, local requirements, and qualified installers still define spacing, application, acceptance, and repair.
Use sampling as a declared risk decision
The official ISO 2859-1:2026 page describes attribute-sampling procedures indexed by AQL for lot-by-lot inspection. A project using drywall screw drive depth inspection sampling must define its lot, defect classes, locations, sample selection, acceptance numbers, escalation, and reinspection. It should not use a small convenient sample to certify concealed work broadly.
Turn findings into a repair decision tree
| Finding | Immediate question | Controlled response |
|---|---|---|
| Isolated proud head | Is framing engaged and recess sound? | Qualified adjustment and reinspection |
| Repeated proud line | Is tool, framing, or setup common? | Hold area and inspect the shared cause |
| Overdrive with paper damage | Has fastening capacity been compromised? | Apply the approved repair detail |
| Missed framing | Where is the intended support? | Refasten under the system procedure |
| Mixed screw identity | What area and cartons are affected? | Quarantine stock and map installed scope |
Reinspect the corrected area
The drywall screw drive depth inspection record should link the original condition, authorized correction, additional fastener if required, final gauge result, face-paper condition, inspector, and date. A repair is not closed merely because the visible depression has been filled.
Keep a tool-and-material feedback loop
Trend defects by tool, bit, crew, board, framing, location, shift, and screw lot. A rising proud rate after a bit change suggests a different action from isolated overdrive around an unsupported edge. Share the evidence before changing several variables at once.
Send a useful screw inquiry
Provide board system, thickness, framing material and thickness, screw type, length, thread, head, recess, finish, tool, photographs, seating rule, defect map, and project requirements. ProAirNails can discuss drywall screws, related screw products, the broader product range, and samples through the inquiry page.
Keep the conclusion inside the inspection boundary
A surface-depth check cannot prove hidden framing engagement, complete assembly performance, fire or acoustic rating, or conformity of unsampled work. It is not a substitute for approved construction documents or qualified professional judgment. ProAirNails supplies product information within the agreed scope; the installer and project authority control application and acceptance.
Use drywall screw drive depth inspection as an early process signal, then connect each visible head to the tool, board, framing, repair, and release evidence behind it.
FAQ
What is a proud drywall screw?
It is a screw head standing above the accepted surface boundary and potentially interfering with finishing.
What is an overdriven screw?
It is driven beyond the accepted seating boundary, often with excessive depression or face-paper damage.
Can fingertips replace a gauge?
No. Touch varies by person and surface; use the defined project inspection method.
Should every screw be inspected?
Follow the project requirement and risk plan; if sampling is used, define lots, locations, defects, and escalation.
Does a flush-looking head prove framing engagement?
No. Appearance alone cannot confirm the screw reached and engaged the intended support.
What can cause repeated proud heads?
Possible contributors include tool setup, bit wear, dense framing, recess damage, screw selection, support, and technique.
Can compound repair an overdriven screw?
Compound changes appearance but does not by itself restore the intended fastening condition; use the approved repair detail.
When should work be held?
Hold the affected area when defects repeat, identity is uncertain, scope is unknown, or the approved repair route is unclear.
What belongs in the inspection record?
Record location, condition, gauge, screw, board, framing, tool, photographs, correction, reinspection, inspector, and date.
What should be sent with a product inquiry?
Send system details, screw specification, tool, observed depth condition, defect locations, photos, quantity, and requirements.





