

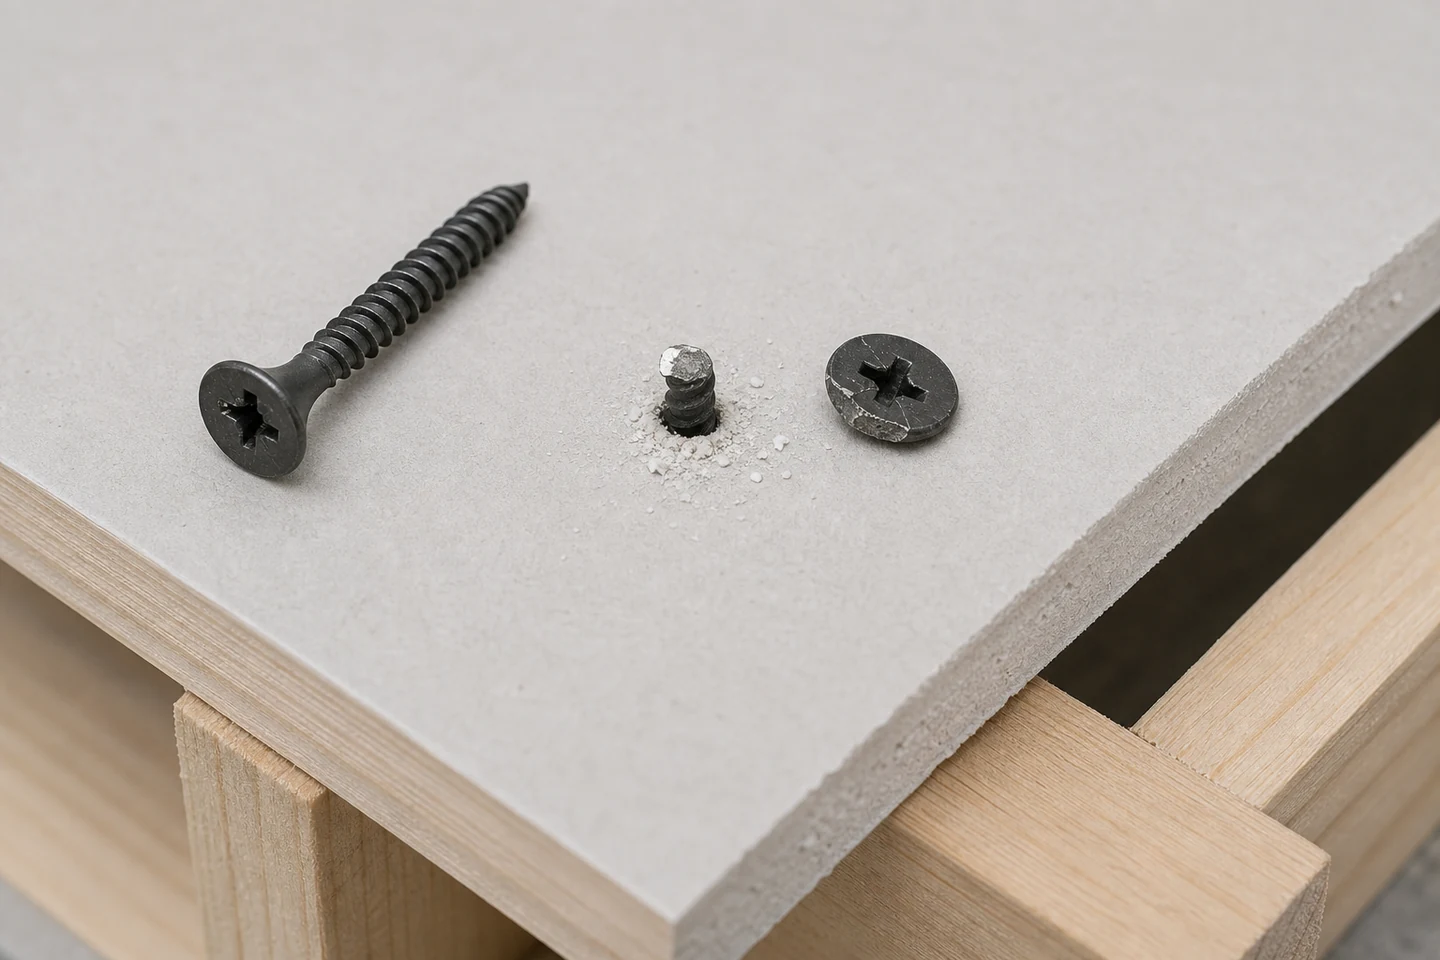
When a drywall screw head breaks off, keep the separated head and embedded shank as one evidence set. The fracture may follow excessive torsion, bending from an angled drive, rising resistance in framing, a damaged recess and repeated cam-out, unsuitable screw selection, or a screw already weakened before installation. The break surface and timing are more useful than the broken head alone.
Stop repeated driving at that location. Mark the wall position, screw reference, tool settings, board stack, receiving material, and stage of installation when the break occurred.
Preserve the head, shank, and installation position
Photograph the head before cleaning it and the shank at the board surface. Record whether the head separated suddenly, twisted gradually, leaned before breaking, or followed a slipping bit. Keep any metal fragments and identify which face belongs toward the head.
If extraction is required, follow the approved wall and tool procedure. Removal can scratch or deform the fracture surface, so photograph it in place first.
Locate the fracture plane
| Break location | Evidence direction | Next comparison |
|---|---|---|
| At head-to-shank transition | High torsion, bending, geometry transition | Drive stage and alignment |
| Inside threaded length | Hard feature, damaged screw, bending path | Receiving material and unused screws |
| Irregular angled surface | Combined bending and torsion | Tool angle and board contact |
| Polished or rubbed surface | Post-break movement or extraction damage | Original photographs and handling record |
Do not identify fracture mode from one photograph alone. A qualified material examination may be needed when lot conformity or repeated failure is at issue.
Reconstruct the final drive seconds
Write the sequence from first thread engagement to fracture. Note speed, clutch or depth setting, axial pressure, bit condition, tool angle, sound, resistance change, and whether the board was already pulled tight. A break near final seating presents a different load history from one at first contact with framing.
Preserve the bit and compare it with a fresh compatible control. A damaged recess can increase unstable loading even when the fracture itself occurs below the head.
Inspect the receiving path
Where authorized, check for dense wood, a knot, steel thickness, doubled framing, an existing fastener, hidden hardware, an incorrect pilot condition, or another obstruction. Confirm the screw type and length for the actual wall system.
A higher tool setting is not a universal correction. It can increase fracture risk, damage the board face, and conceal an unsuitable screw-material combination.
Compare unused screws without destroying the lot evidence
Retain samples from the beginning, middle, and end of the package where traceability permits. Inspect heads, recesses, shanks, threads, straightness, coating, and visible handling damage. Use controlled drives only after the tool, material, and method are confirmed.
Record whether another break follows the same insertion stage or receiving feature. One fractured screw does not establish a defect rate, while repeated events need containment under the quality plan.
Compare package and storage condition as well. Crushing, loose fasteners, contamination, or mixed references can change what reaches the tool even when the printed carton description is unchanged.
Plan extraction, replacement, and containment
Determine whether the embedded shank affects replacement position, board support, finish repair, or hidden-service risk. Use the approved extraction or alternative fastening procedure rather than improvising around the broken metal. Hold affected screws or tools if failures repeat.
The limitation is clear: a preserved fracture set does not establish structural adequacy, wall-system compliance, screw conformity, or tool safety. Those conclusions require the applicable project, product, service, and material criteria.
Review the Drywall Screw category and the broader screw range. Send screw and bit references, tool settings, wall stack, receiving material, fracture photographs, and event sequence through the inquiry page when a drywall screw head breaks off.
FAQ
Can I leave the broken screw shank in the wall?
The decision depends on its location, wall system, replacement spacing, hidden services, finish requirements, and project procedure. Assess it before covering the area.
Does a snapped head mean the screw is defective?
Not by itself. Tool alignment, excessive resistance, drive settings, unsuitable application, recess damage, handling, and screw condition can all contribute.
Should I increase driver power after one screw breaks?
No general increase should be made before the fracture and resistance are investigated. More drive energy can repeat the break or damage the board and framing.
A complete evidence set makes drywall screw head breaks off a traceable fracture event rather than a discarded fastener.





