

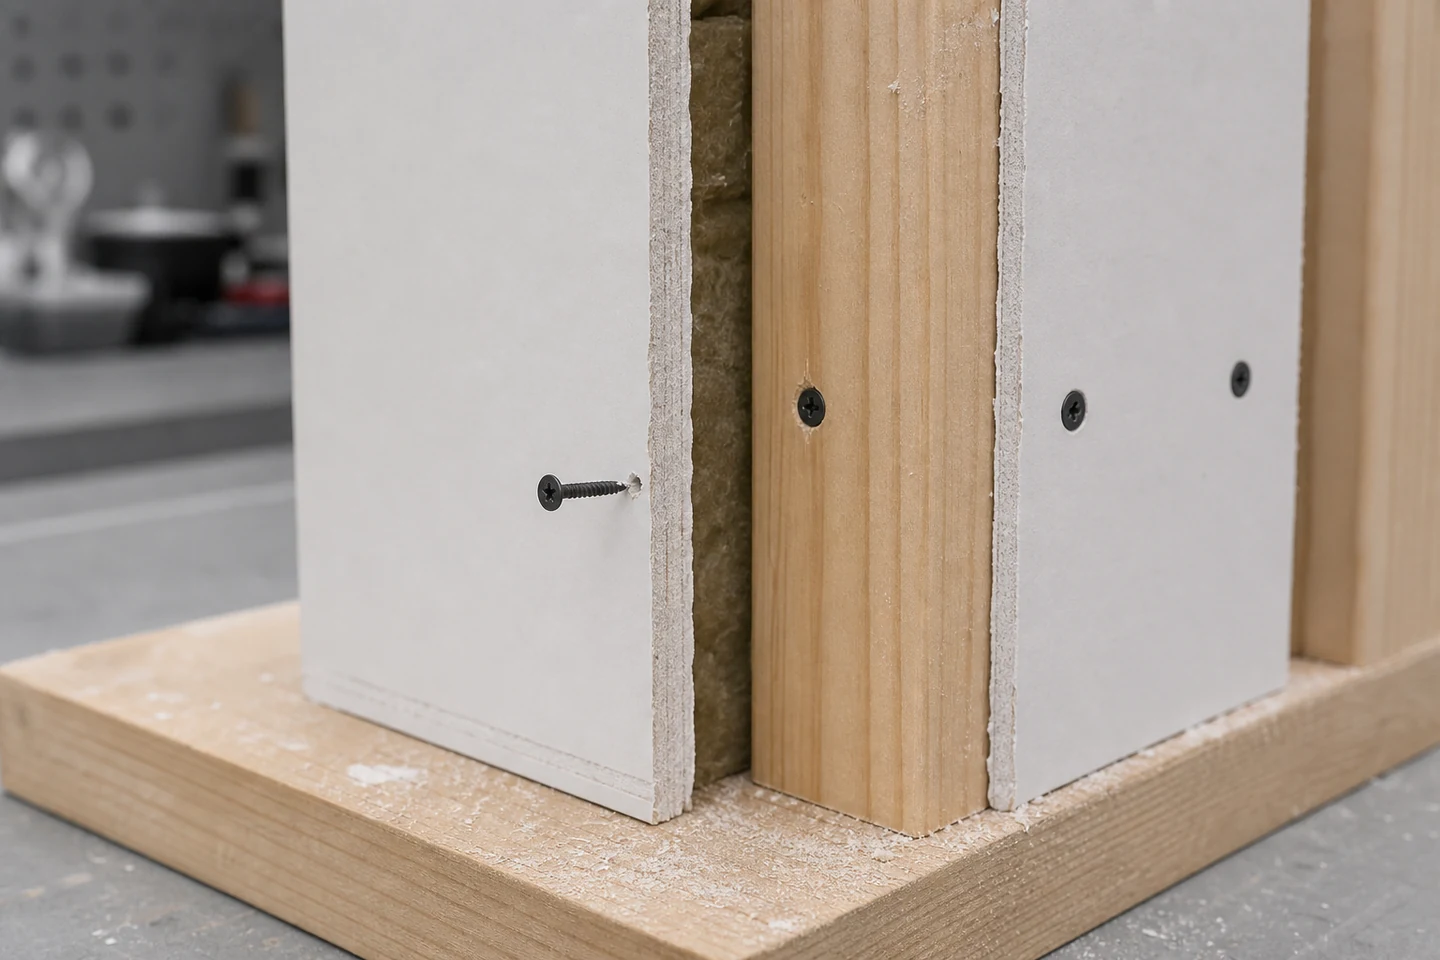
When a drywall screw misses a stud, the first task is to confirm where the fastener actually traveled without creating more uncontrolled holes. The visible fastening line may be offset from framing because of an incorrect reference, bowed or shifted framing, board movement, angled driving, a seam detail, or an opening and service zone that changes the expected layout.
Do not probe blindly. Hidden electrical, plumbing, mechanical, and other services require the applicable site procedure and qualified review before exploratory work.
Use drywall screw misses stud as the event label in the inspection record so photographs, wall references, repair decisions, and follow-up checks remain connected to the same location.
Preserve the missed position
Photograph the screw head, nearby fasteners, board seam, floor and ceiling references, and any opening or corner. Mark the suspected miss on removable tape rather than drawing across the finish. Record whether the screw spun, failed to pull the board tight, drove unusually easily, or stopped against an unexpected obstruction.
If the wall is unfinished, inspect the rear side where access is authorized. A screw visible beside the stud is direct evidence; a loose-feeling head from the finished side is only an indicator.
Build a fastening-line map from known references
Start with confirmed framing at an exposed edge, opening, approved drawing reference, or other verified location. Transfer the line across the work area using the project method. Mark every installed fastener relative to that line and note changes near corners, blocking, board joints, and penetrations.
| Map clue | Possible direction | Next check |
|---|---|---|
| One isolated miss | Angled drive, local bow, operator alignment | Inspect entry angle and nearby framing |
| Whole row offset | Incorrect transferred reference | Re-establish the line from a known point |
| Line changes near opening | Header, trimmer, blocking, service zone | Review approved assembly information |
| Alternating engagement | Narrow target, framing twist, inconsistent angle | Compare rear-side or authorized inspection evidence |
Separate location error from drive-angle error
A correct surface mark does not guarantee the screw entered on that line. Hold a representative tool and screw at the original orientation and estimate the internal path through the board thickness. A small visible angle can create meaningful lateral offset before the point reaches framing.
Check whether the tool nose sat flat, whether adjacent material forced the tool to lean, and whether the operator could see the target reference. Use a controlled mock-up rather than another hole in the finished wall to compare angles.
Check framing condition and board contact
Where inspection is permitted, look for bowed framing, gaps behind the board, shims, resilient channels, multiple board layers, or other components that change the expected target. Confirm the screw type and length for the actual wall system. A longer screw is not a universal correction because it can create service risk or violate the approved assembly.
Board movement during fastening can also shift the entry point. Support and hold the sheet according to the installation procedure before setting a replacement position.
When several locations are involved, group each drywall screw misses stud record by sheet, fastening line, and installation sequence rather than combining all misses into one total.
Choose the repair in assembly order
- Confirm the framing or approved receiving member.
- Determine whether the missed screw should be removed under the project method.
- Place any replacement fastener at an approved distance from the original hole and board edge.
- Restore the board surface and finishing layers only after fastening is accepted.
Do not leave a loose screw concealed merely because the finish can cover it. The responsible project authority should define the repair, spacing, and surface restoration.
Set a prevention checkpoint for the next sheet
Confirm framing lines before coverage, transfer references after every board position change, and inspect an early sample of fasteners before completing the field. Record locations where framing or service details require a different fastening pattern.
The limitation is clear: a surface map does not establish hidden service locations, framing capacity, fire or acoustic assembly compliance, or structural adequacy. Those decisions require approved drawings, site investigation, and qualified authority.
Review the Drywall Screw category and the broader screw range. Send wall-system details, screw reference, fastening-line map, entry photographs, and authorized inspection evidence through the inquiry page when a drywall screw misses a stud.
FAQ
Can a missed drywall screw be left behind the finish?
The repair depends on the wall system and project requirements. A loose or unengaged screw should be assessed before finishing rather than hidden without an approved disposition.
Should I drive another screw next to the missed hole?
Only after confirming the receiving member, hidden-service risk, spacing, edge distance, and repair method. Random nearby probing can add damage and risk without locating framing.
Does a spinning drywall screw prove it missed the stud?
No. It may indicate missing framing, stripped material, an oversized hole, incompatible screw, damaged thread, or another assembly condition. Confirm the internal path where authorized.
A verified wall map makes a drywall screw misses stud event traceable and reduces repeated trial holes.





