

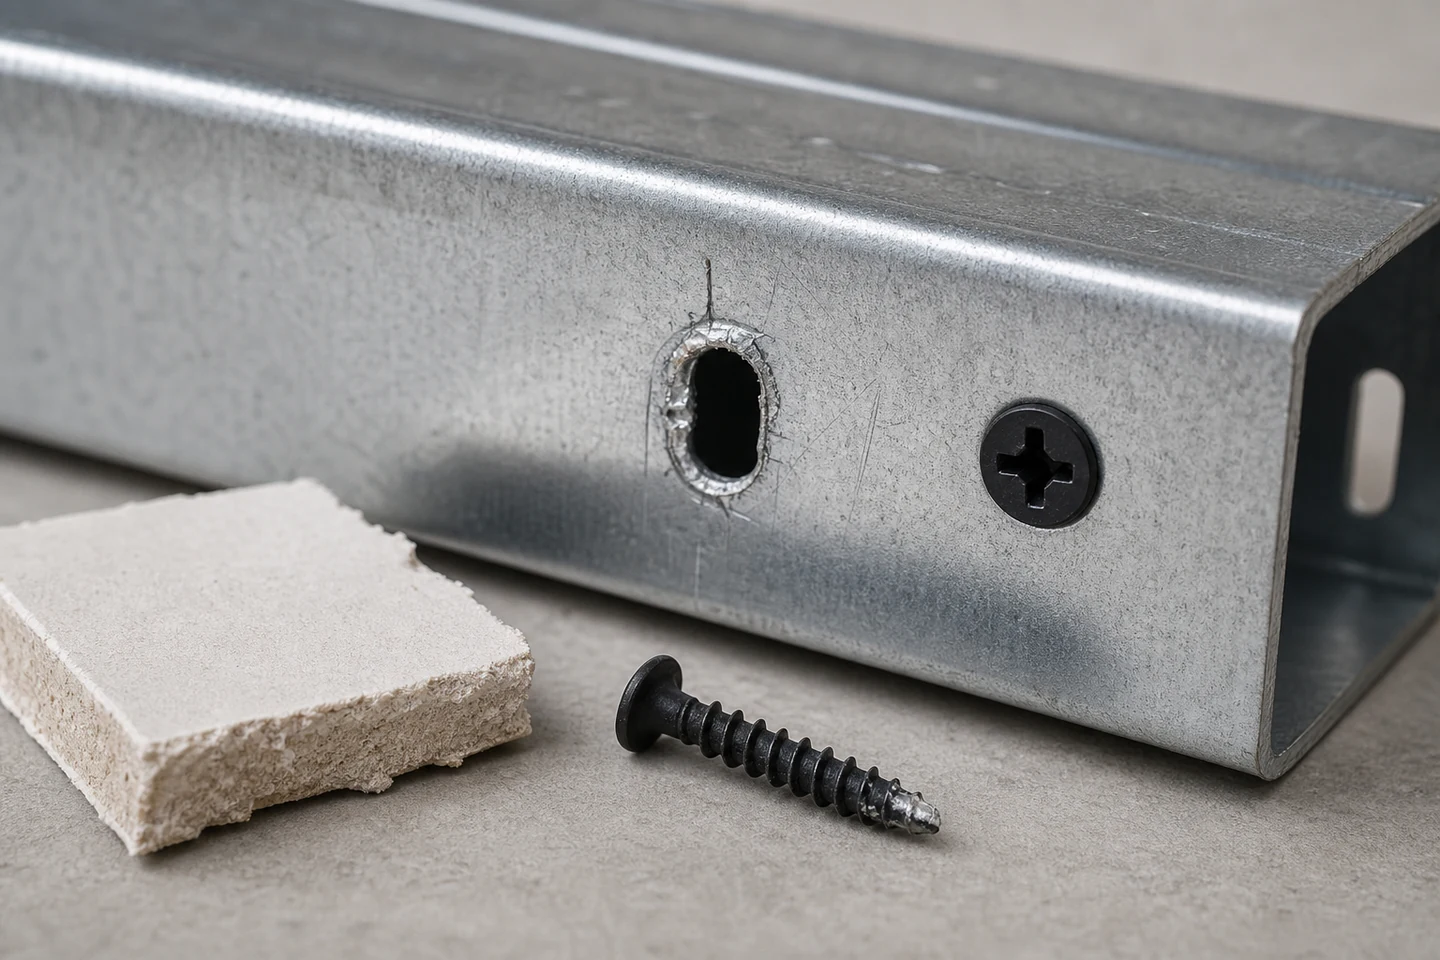
When a drywall screw thread strips in metal stud, stop driving as soon as the head spins without drawing the board tighter. Continued rotation can enlarge the opening, erase the original thread marks, tear the board face, and make a tool-setting problem look like a material problem. Preserve the screw, mark the hole, and record the final seconds of the drive.
The practical question is not simply whether the screw feels loose. It is where engagement was lost: at initial piercing, during thread formation, while the board was being pulled tight, or after the head reached the surface.
Map the failed hole before adding another screw
Photograph the board face, screw head, stud face, and reverse side where access is permitted. Mark the drive direction, stud flange edge, board joint, nearby fasteners, and any visible deformation. Measure the failed opening using the approved inspection method without filing or reshaping it.
An oval hole may indicate angled entry or movement. A round enlarged hole can follow continued spinning. A torn or burred opening may preserve clues about point entry, thread formation, and the direction of final loading.
Reconstruct the engagement sequence
| Observed stage | Possible direction | Evidence to compare |
|---|---|---|
| Point does not pierce cleanly | Point condition, steel thickness, low axial control | Unused screws and stud sample |
| Screw enters but spins early | Limited thread engagement or enlarged entry | Thread diameter and hole profile |
| Board pulls tight, then loosens | Overdrive or continued rotation | Depth setting and drive time |
| Only selected positions fail | Stud movement, doubled steel, edge location | Framing map and support |
Record speed, tool angle, axial pressure, bit fit, clutch or depth setting, and whether the operator paused during piercing. A driver can remain within its general operating range while the local combination still produces unstable engagement.
Inspect the removed screw as a matched sample
Keep the screw with its marked hole. Inspect the point, thread crest, thread root, straightness, coating, recess, and any metal fragments caught between threads. Compare it with unused screws from the same package and a confirmed compatible reference.
Do not treat shiny thread surfaces alone as proof of defective manufacture. Contact with the stud, removal, and post-failure spinning can all polish or deform the thread.
Confirm the actual stud and joint stack
Record flange thickness, stud layers, board thickness, board gap, screw length, thread family, and fastening position. Check whether the point entered near a flange edge, through lapped framing, beside a service opening, or into a moving unsupported flange.
Fine-thread drywall screws are commonly associated with light-gauge steel applications, but suitability still depends on the specified wall system, steel condition, screw geometry, and required performance. A familiar product label is not a substitute for the project criteria.
Run a controlled hole-pattern comparison
Use representative board and stud offcuts approved for testing. Keep screw, bit, operator, support, spacing, and entry angle fixed while changing only one variable such as speed or depth control. Mark every position, including successful drives, and record whether the head seats, spins, tears the paper, or remains proud.
Repeat the comparison at realistic flange locations rather than only at the center of a rigid coupon. If failure follows one tool setting, screw reference, stud batch, or location pattern, isolate that input for qualified review.
Define replacement and containment rules
Do not place a replacement screw into the same enlarged opening. Follow the approved spacing and repair method, and assess whether the damaged hole affects board support or permitted fastener location. Hold affected screws or framing when the event repeats beyond the quality plan threshold.
The limitation is important: this inspection cannot establish wall-system compliance, structural capacity, screw conformity, or tool safety by itself. Those decisions require the applicable design, sampling, service, and acceptance requirements.
Review the Drywall Screw category and the broader screw range. Send screw and bit references, stud thickness, board stack, hole photographs, tool settings, and the drive sequence through the inquiry page when a drywall screw thread strips in metal stud.
FAQ
Can I tighten a stripped drywall screw again?
Repeated tightening usually enlarges the damaged hole instead of restoring engagement. Stop and use the approved replacement location and wall repair procedure.
Does a stripped hole mean the metal stud is too thin?
Not by itself. Stud thickness, screw geometry, entry angle, speed, support, overdrive, and local framing details can all affect engagement.
Should I use a longer drywall screw?
Length alone does not correct thread formation in the stud flange and may introduce hidden-service or system conflicts. Confirm the specified screw for the complete wall stack.
A marked hole, matched screw, and controlled drive record turn drywall screw thread strips in metal stud into a traceable engagement diagnosis.





