

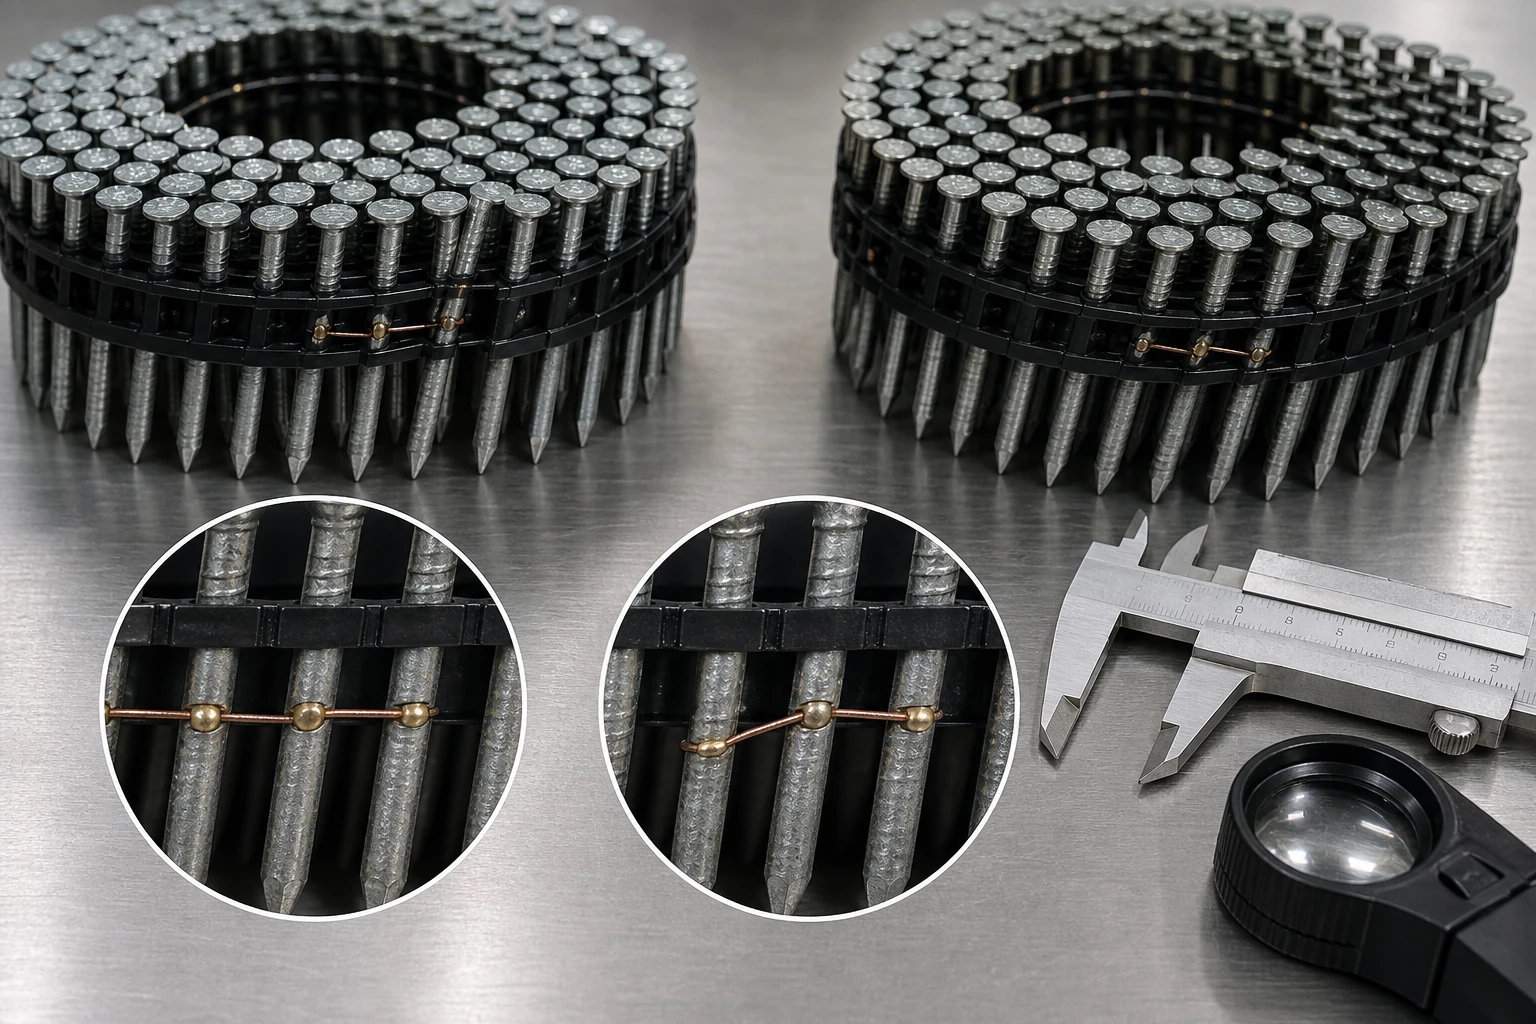
A coil nail wire weld alignment check asks whether each collation-wire joint remains in its intended position relative to the nail shanks, pitch, and feed path. The joint should be documented before the coil is reshaped or loaded because handling can move loose turns and erase the relationship between a protruding weld and a later tool event.
ProAirNails recommends treating the weld as a location-specific feature. Map the joint, inspect several nails on both sides, preserve the leader and tail, and compare any feed interruption with the joint’s actual arrival at the feed mechanism.
Start with the joint, not the coil silhouette
General coil roundness is useful, but it does not answer whether a wire splice is centered, offset, proud, sharp, cracked, or locally heat-affected. Place the coil in its free supported state. Do not squeeze it round or trim the joint before recording both faces and its position within the coil.
Give every weld a location code
Identify coil lot, carton position, coil number, turn number, and the nearest nail numbers. Mark wire side and feed direction. A code such as C03-T04-N118 connects photographs, measurements, retained samples, and tool events without relying on a vague note such as “bad weld near middle.”
Build a joint-centered measurement strip
| Feature | Record at joint | Compare nearby |
|---|---|---|
| Weld location | Distance to adjacent shanks | Normal wire-to-shank position |
| Lateral offset | Side displacement of joined wire | Wire path before and after joint |
| Protrusion | Height or sharp projection | Ordinary wire profile |
| Pitch | Spacing across several nails | Remote section of same coil |
| Surface evidence | Discoloration, residue, cracking | Unjoined wire surface |
Read the wire path in feed direction
Follow the upstream wire, joint, downstream wire, and adjacent nail shanks in order. A centered weld can still introduce a projection; an offset weld can alter local pitch; and a clean-looking joint may sit too close to a shank. Record each condition separately instead of grading the complete joint with one visual score.
- Photograph both collation-wire sides.
- Measure before flexing the coil.
- Retain at least five nails on each side of the joint.
- Record leader and tail construction.
- Bag detached fragments with the location code.
Keep joint defects distinct from other coil faults
Ovality, crossed turns, bent heads, adhesive debris, deformed leaders, magazine drag, and driver wear can all interrupt feeding. They should remain separate branches in the investigation. A coil nail wire weld alignment check becomes useful only when the suspected weld condition and the observed event share a documented location and sequence.
Time the joint through the tool
Use the named nailer, magazine condition, air pressure, substrate, loading route, and event count. Note the nail number at loading, approach, feed, interruption, recovery, and any intervention. Stop safely if wire projects, fragments, or resistance appears. Follow the tool manufacturer’s operating and isolation instructions.
Classify the event without overclaiming cause
| Observed pattern | Immediate interpretation | Next comparison |
|---|---|---|
| Projection at joint, event at same count | Joint is a credible contributor | Conforming joint in same tool |
| Offset joint, no event | Geometric difference without demonstrated effect | Repeat across declared sample |
| Event occurs before joint arrives | Joint does not match timing | Magazine, pitch, leader, tool condition |
| Loose fragments around joint | Contain for safety and identity review | Fracture and adjacent-wire evidence |
| Events across remote coil sections | Problem may be broader than welds | Tool and coil-wide inspection |
Use a fastener standard within its proper scope
The official ASTM F1667/F1667M-21a page provides requirements and terminology for driven fasteners. It does not define the buyer’s exact weld-position fixture, tool-event limit, or acceptance rule for every wire-collated system.
Expand from a joint to a lot deliberately
The ISO 2859-1:2026 page describes lot-by-lot attribute sampling indexed by AQL. It can support a declared plan after weld defects are operationally defined, but it does not prove that one examined joint represents an entire shipment.
Set containment from the evidence pattern
Segregate coils with protrusions, loose wire, uncertain identity, or repeated location-matched feed events. Preserve conforming comparisons from the same carton and other carton positions. Define whether containment applies to one coil, a mapped carton region, a production interval, or the lot; do not expand or reduce scope from one dramatic photograph alone.
Prepare an inquiry that preserves the feed story
Provide nail dimensions and finish, collation angle and wire details, lot, carton map, joint location codes, measurements, photographs, tool model, magazine condition, pressure, substrate, event counts, and fragments. ProAirNails can discuss coil nails, the wider pneumatic nail range, other products, and samples through the inquiry page.
State what the mapped result can support
A coil nail wire weld alignment check cannot by itself prove joint strength, structural performance, every tool’s compatibility, or the condition of unexamined coils. A short tool trial is not a universal service-life test. ProAirNails can help interpret identified product evidence; the buyer controls application release and sampling.
Retain joint sections, comparison sections, images, and event logs. Repeat the coil nail wire weld alignment check when wire, weld settings, nail pitch, coil count, packaging, leader design, tool, or acceptance criteria change.
FAQ
Is coil roundness enough to approve a weld?
No. Inspect the joint’s location, offset, projection, surface condition, and surrounding pitch separately.
Why number nails near the joint?
Nail numbers connect a physical weld location to the exact point where a feed event occurs.
Should a protruding joint be trimmed before inspection?
No. Preserve and photograph the received condition before any alteration or tool trial.
Can discoloration prove a weak joint?
No. It is surface evidence that may guide investigation, but strength requires an appropriate defined method.
How many nails should remain around a retained joint?
Keep enough on both sides to preserve pitch, wire path, and feed direction; five per side is a practical starting point.
What if a tool event occurs before the joint arrives?
Investigate the leader, magazine, pitch, coil condition, and tool rather than assigning that event to the weld.
Can one passing joint release a shipment?
No. Release depends on the declared sampling plan, defect definition, lot identity, and application evidence.
Why inspect both wire sides?
Offset, residue, projection, or cracking may be visible on only one side of the collation.
When should testing stop?
Stop and isolate the tool if sharp wire, fragments, abnormal resistance, or unsafe feeding appears.
What should be sent with a complaint?
Send location-coded coils, retained joints, images, measurements, tool conditions, counts, fragments, and carton identity.





